
Setting up two monitors takes less time than most people expect once you know which cables and settings matter. The real work is not plugging in a second screen. It is getting your graphics card, cables, and display settings to agree with each other. This guide covers connecting two monitors on Windows and Mac. It also covers fixing common problems and arranging your workspace so the second screen earns its desk space.
What You Need Before Setting Up Two Monitors
Before you buy anything, check what your computer can actually support. Most desktop graphics cards have two or three video outputs, usually some mix of HDMI, DisplayPort, and USB-C. Look at the back of your tower or the side of your laptop to see what is available.
If you are on a laptop, ports are usually the limiting factor rather than the graphics chip itself. A laptop with only one HDMI port and no USB-C can still run two monitors. You will just need a USB-C hub, a docking station, or a USB graphics adapter.
Match your cable types to your ports before you start. HDMI and DisplayPort both carry video and audio over a single cable. Either works well for a two monitor setup. Avoid older VGA connections if you have a choice, since they only support lower resolutions and no audio.
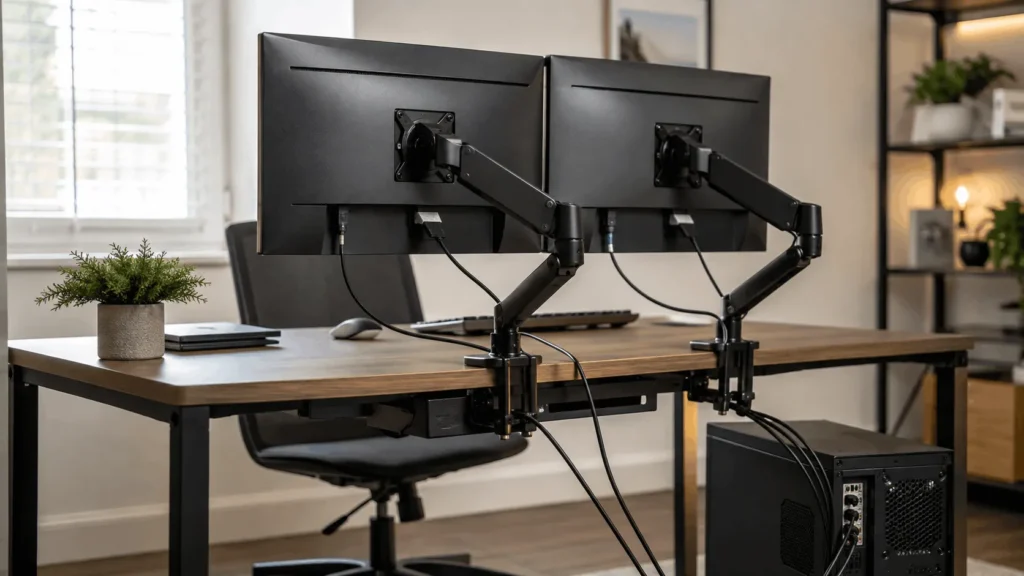
Also check that both monitors can physically sit where you want them. A monitor arm or a simple stand frees up desk space. It also makes it easier to line up the screens at the same height. For more on organizing the rest of the space around your setup, see our full home office setup guide.
How to Physically Connect Two Monitors
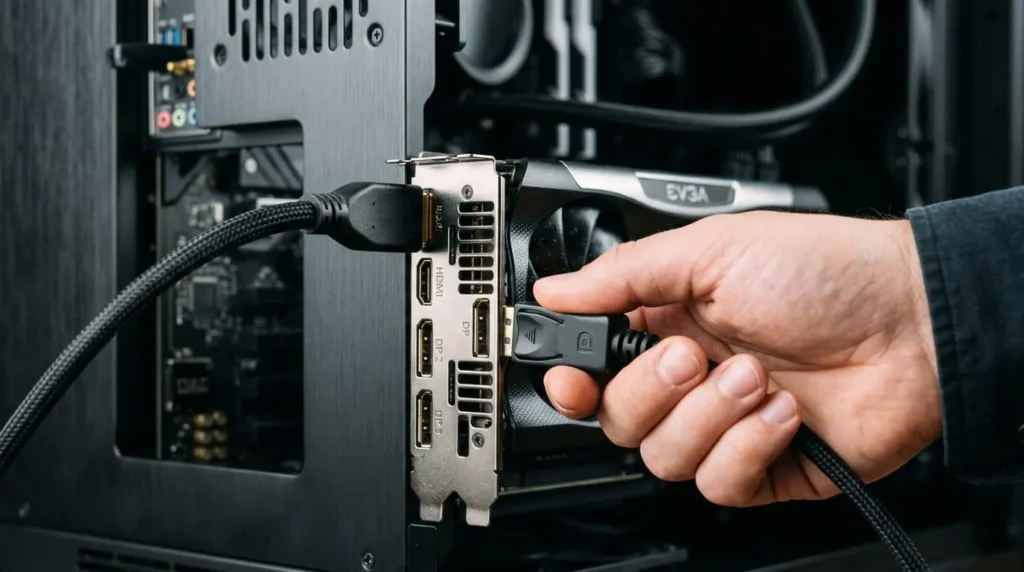
Plug each monitor into its own output on your graphics card, not the motherboard, if you have a dedicated GPU installed. The motherboard’s video output is usually disabled once a graphics card is in the system. Using it by mistake is one of the most common reasons a second monitor will not turn on. Use a separate cable for each monitor and connect them directly to your PC’s outputs. Once both are powered on and connected, your computer should detect them automatically within seconds.
If your laptop has two video outputs, such as an HDMI port and a USB-C video port, connect one monitor to each. If it only has one port, a USB-C hub or docking station lets you run both monitors through a single cable. Some hubs limit resolution or refresh rate when driving two displays at once. Check the specs first if you plan to run two 4K monitors.
How to Set Up Two Monitors on Windows
Once Windows detects both displays, right click anywhere on your desktop and choose Display settings. You will see two numbered boxes representing your monitors. This is where the setup actually happens.
Click Identify if you are not sure which numbered box matches which physical monitor. Windows briefly shows a large number on each screen so you can match them up correctly.
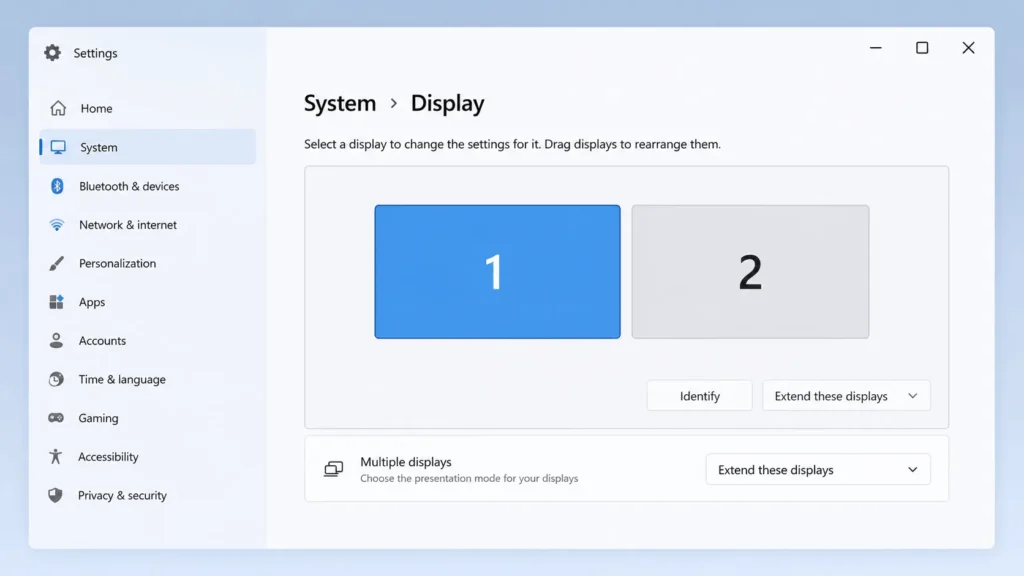
Drag the boxes so their arrangement matches how the monitors physically sit on your desk. This determines which direction your cursor moves when you slide it off one screen and onto the other.
Scroll down to Multiple displays and choose Extend these displays. This turns your two monitors into one continuous workspace, which is what most people mean by a two monitor setup. Duplicate these displays mirrors the same image on both screens instead. That is useful for presentations but not everyday multitasking.
Set your primary monitor by selecting it in the arrangement view and checking Make this my main display. Your taskbar, desktop icons, and most new windows default to this screen.
Finally, check the resolution and scaling for each monitor individually. Windows applies these settings per monitor, not globally. A 4K monitor and a 1080p monitor can each look correct at the same time.
How to Set Up Two Monitors on a Mac
Connect both monitors, then open System Settings and go to Displays. macOS usually detects a second monitor within seconds and adds it as a new display automatically.
Click Arrange at the top of the Displays panel to see both screens shown as rectangles. Drag them to match your physical desk layout, just as you would in Windows. The white bar at the top of one rectangle marks it as your main display. Drag that bar to a different screen to change which one holds your menu bar.
Under each display’s settings, choose whether it should extend your desktop or mirror your main screen. Extended is the default and the better choice for most work, since it gives you two separate spaces to place windows.
If one monitor looks blurry or too small, click on it and adjust its resolution under Default or Scaled. Scaled resolutions let you fit more content on screen at the cost of some sharpness. This is worth trying on a monitor running at 1440p or higher.
Fixing the Most Common Two Monitor Problems
If your second monitor is not showing up at all, confirm the cable is fully seated at both ends. Try a different cable if you have one, since a damaged HDMI or DisplayPort cable is an easy to miss cause. On Windows, open Display settings and click Detect. On a Mac, hold Option and click Detect Displays.
Text that looks blurry or oddly sized on one monitor is almost always a scaling mismatch, not a hardware problem. This happens often when you pair monitors of different resolutions, like a 4K primary display with an older 1080p secondary screen. Adjust the scale percentage for the affected monitor individually rather than changing your overall display settings.
If your cursor jumps to the wrong screen at the edge, your display arrangement does not match your physical setup. Go back into Display settings and drag the monitor icons until the cursor moves naturally between screens.
A monitor that flickers or drops its connection intermittently is often a cable or refresh rate issue. Try lowering the refresh rate slightly, or swap to a different port on your graphics card, before assuming the monitor is faulty.
Laptop users sometimes find that closing the lid turns off both external monitors instead of just the laptop screen. This depends on your power settings, not your monitor setup. On Windows, this is controlled in Power Options under what closing the lid does. On a Mac, external monitors keep working as long as the laptop stays plugged in and awake.
Getting the Ergonomics Right
Two monitors only help your productivity if your neck and eyes are not paying for it. Set both screens so their top edge sits at or just below your eye level when you are sitting up straight. This keeps you from tilting your head back to read the top of the screen.

Keep both monitors roughly 20 to 28 inches from your face. Angle them slightly inward if they sit side by side, to reduce neck twisting as your attention moves between screens.
If you use one monitor more than the other, center it as your primary and angle the secondary screen slightly beside it. Avoid splitting your attention evenly between two screens set dead center.
A monitor arm makes these adjustments far easier than a fixed stand. You can change height and angle in seconds instead of stacking books under a base.
Making the Most of a Two Monitor Workflow
On Windows, drag a window to the edge of a screen to snap it into place. Or press the Windows key with an arrow key to snap windows without touching the mouse. On a Mac, hold your cursor on the green button in a window’s corner for similar split screen options.
Decide on a rough division of labor between your two screens instead of scattering windows randomly. A common approach keeps email and chat on one monitor and your main task on the other. That way notifications do not interrupt your focus.