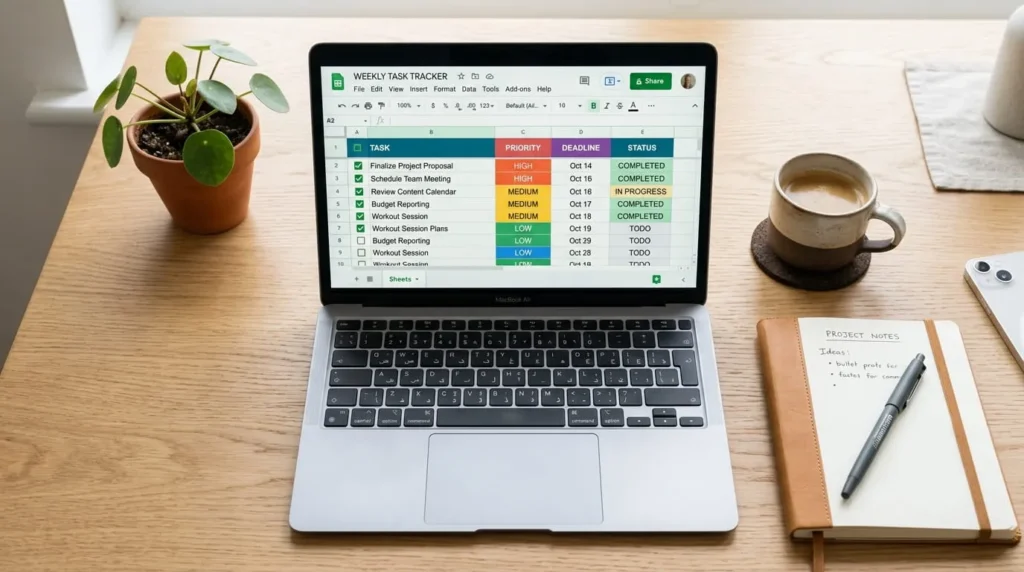

A cluttered to do list is worse than no list at all. If you have tried sticky notes, app-based trackers, or a notebook that never leaves your bag, a Google Sheets to do list template solves a specific problem: it keeps every task, deadline, and priority in one place you can open from any device. Unlike a single-purpose app, a spreadsheet bends to whatever system you already use, whether that is a simple daily checklist or a shared tracker for a small team.
This guide walks through what a strong to do list template needs, how to build one from a blank sheet in under ten minutes, and how to decide between Google’s built-in template and a custom version
Why a spreadsheet works better than a plain checklist
A basic checklist only tells you what needs to get done. A spreadsheet tells you what needs to get done, by when, how important it is, and how far along you already are. That distinction matters once your task list grows past ten or fifteen items.
Google Sheets also has three advantages that dedicated to do list apps rarely match. First, it is free and already tied to the same account as your email and calendar. Second, formulas can calculate your completion rate automatically, so you do not have to count finished tasks by hand. Third, sharing a sheet with a coworker or family member takes one click, and every edit is saved in version history, so nothing gets lost if someone changes something by mistake.
The tradeoff is that a spreadsheet will not send you a push notification when a deadline is close. If reminders matter more to you than flexibility, pair your sheet with your phone’s calendar app rather than relying on the sheet alone.
A well-kept task list tends to go hand in hand with a well-kept desk, and a properly organized home office reinforces both habits
What your to do list template actually needs
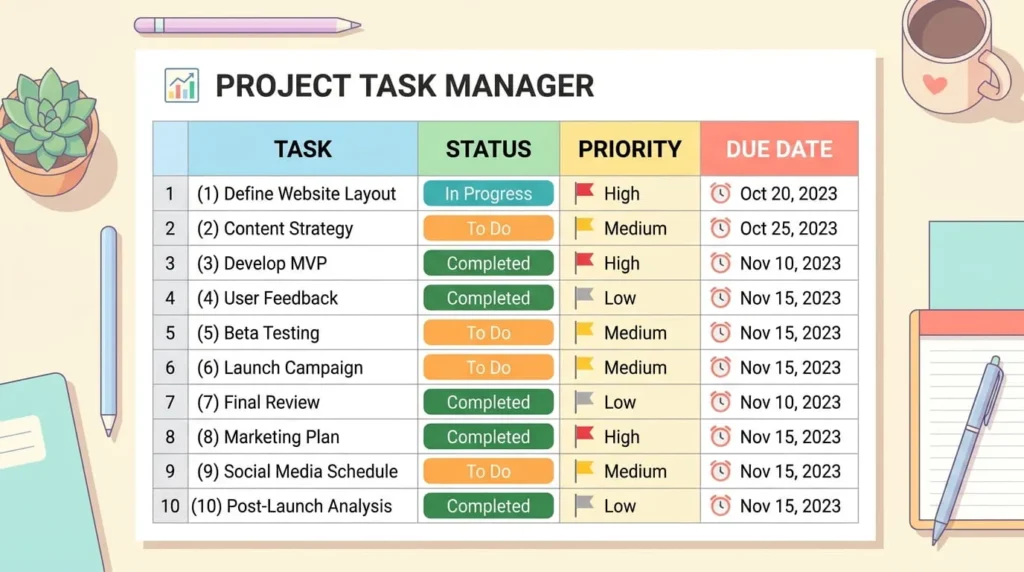
Not every column adds value. A template with too many fields becomes another chore to maintain. Start with the columns below, then add only what you will genuinely use.
1: Task name
Keep this short and specific. “Email the vendor about the March invoice” is more useful later than “follow up,” because you will not remember what “follow up” meant three weeks from now.
2: Status or checkbox
A checkbox column is the fastest way to mark something done, but a status column with options like Not Started, In Progress, and Done gives you more detail when a task takes several days.
3: Priority
A dropdown with High, Medium, and Low lets you sort and filter by what matters most today, instead of working through the list top to bottom regardless of urgency.
4: Due date
Dates let you sort chronologically and, combined with conditional formatting, flag anything that is overdue in red before you even scroll through the list.
Notes or subtasks
Larger tasks often hide several smaller steps. A notes column, or a separate subtask row indented under the main task, keeps that detail from cluttering the task name itself.
How to build the template step by step
You do not need any scripting knowledge to build this. Every step below uses features already built into Google Sheets.
Step 1: Set up your columns
Open a blank Google Sheet and label row one with your column headers: Task, Status, Priority, Due Date, and Notes. Freeze this row by selecting View, then Freeze, then 1 row, so your headers stay visible as you scroll.
Step 2: Add checkboxes
Select the Status column below the header, then go to Insert and choose Checkbox. Google Sheets will convert that column into clickable checkboxes, which is faster than typing “done” into every row by hand.
Step 3: Build dropdowns for priority and status
Select the Priority column, open Data, then Data Validation, and choose “Dropdown” as the criteria. List your options, such as High, Medium, and Low. Repeat this for a Status column if you want more detail than a checkbox alone provides.
Step 4: Apply conditional formatting
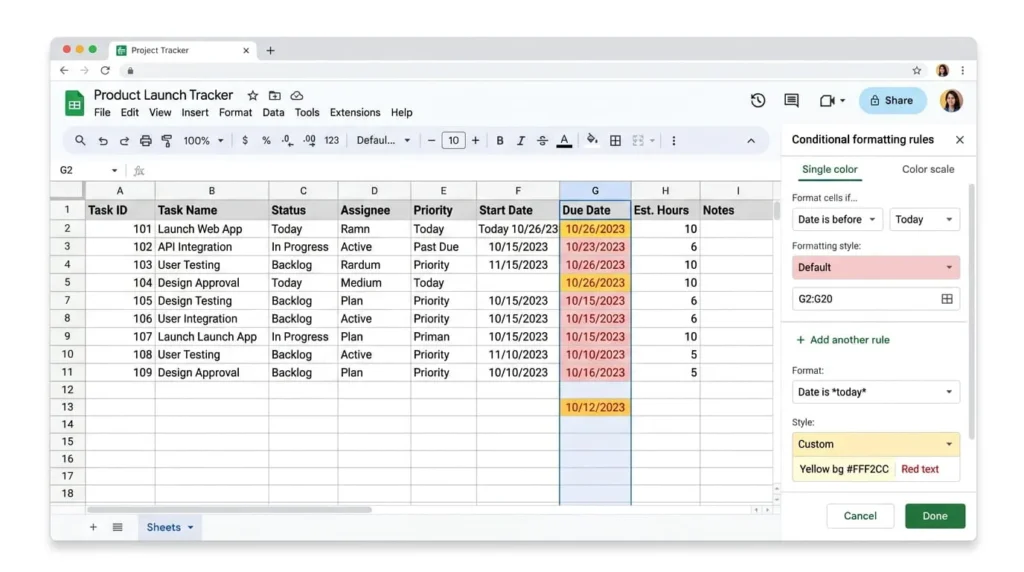
Highlight your Due Date column, open Format, then Conditional Formatting. Set a rule so any date before today turns red, and any date within the next three days turns yellow. This turns your sheet into a visual warning system instead of something you have to read line by line.
Step 5: Add a progress tracker
At the top of the sheet, add a small summary using a formula like =COUNTIF(B2:B50,TRUE)/COUNTA(A2:A50) to calculate the percentage of completed tasks, assuming your checkboxes sit in column B and your task names in column A. Format that cell as a percentage, and you have a live progress bar without any add-ons.
Google’s built-in template versus building your own
Google Sheets includes a basic to do list under Template Gallery, in the Personal section. It has a task column and a checkbox, which works fine for a short personal list, but it lacks priority, due dates, and any kind of progress tracking.
Click Share in the top-right corner and enter the email addresses of anyone who needs access. Give editors “Editor” permission and anyone who only needs visibility “Viewer” permission, so your priority and due date columns do not get changed by accident.
For anything beyond a short personal list, building your own from a blank sheet, or starting from a free downloadable version, gives you more control over which columns matter to your specific workflow. The built-in version is best when you want something in thirty seconds and do not plan to track deadlines. A custom build is worth the extra ten minutes if you are managing recurring tasks, project work, or a list you plan to share.
Sharing a to do list with a team
If several people will edit the same sheet at once, consider adding an Owner column so everyone knows who is responsible for each task. For sheets with sensitive columns, use Data, then Protect Sheets and Ranges, to lock formulas or headers while still letting people check off tasks.
Common mistakes that make a to do list template fail
The most common mistake is adding too many columns before you know what you actually need. Start minimal, use the sheet for a week, then add fields only when you notice yourself wanting them.
The second mistake is letting completed tasks pile up instead of archiving them. A sheet with two hundred rows, most of them checked off, becomes harder to scan than a short active list. Move finished tasks to a separate “Completed” tab weekly, or filter your view to hide anything marked done.

The third mistake is skipping the due date column entirely. Without dates, a to do list turns into a list of things you intend to do someday, rather than a schedule you actually follow. The same clutter problem shows up in Excel as stray blank rows, and removing empty rows in Excel takes a similar cleanup approach.