
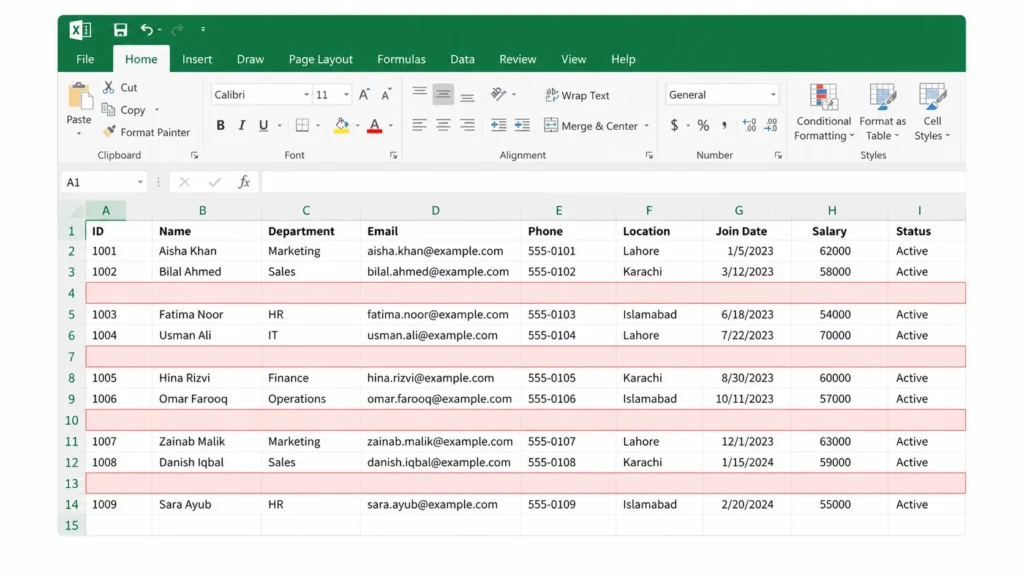

If you have ever pressed Ctrl+G, selected Blanks, and hit delete, you have probably lost data you meant to keep. That shortcut is the most commonly recommended way to remove empty rows in Excel, and it is also the one that causes the most damage. It deletes any row that contains even one blank cell, not just rows that are completely empty.
This guide walks through the methods that actually work, including which one to use depending on whether your rows are fully blank or only partially blank, how to handle Excel tables and Excel Online, and when you should leave blank rows alone entirely.
Why Empty Rows Cause Problems in Excel
A blank row does more damage than it looks like it should. Sort and filter operations often stop at the first empty row instead of running through your full data set. PivotTables built on a range with blank rows can miscount or misgroup records. Formulas that reference a full column, like a VLOOKUP or SUMIF, can return errors or zero values when they hit unexpected gaps.
If you plan to import the data into another tool, a database, or a reporting system, blank rows can break the import entirely or create empty records that need to be cleaned up later. None of this is dramatic on its own, but it adds up, especially in spreadsheets that get reused month after month.
The Mistake Most Tutorials Get Wrong
Search for this topic and you will find dozens of guides recommending Ctrl+G, then Special, then Blanks, then Delete. This does select every blank cell in your selected range, but that is not the same as selecting every blank row.
If a row has data in column A and C but nothing in column B, this method still selects that row’s blank cell in column B. When you delete it, Excel deletes the entire row, including the data in columns A and C. On a small sheet you might catch this. On a sheet with hundreds of rows, you usually will not notice until later.
This method is only safe when every row in your range is either completely full or completely empty, with no partial rows in between. For anything else, use one of the approaches below.
How to Remove Completely Empty Rows Without Losing Data
This is the method to use when your data has rows with some blank cells mixed in with fully blank rows. It relies on a helper column and the COUNTA function, which counts how many non-blank cells are in a row.
Step 1: Insert a helper column
Add a new column immediately to the right of your data. Label it something like “Row Check” so you remember to delete it later.
Step 2: Add the COUNTA formula
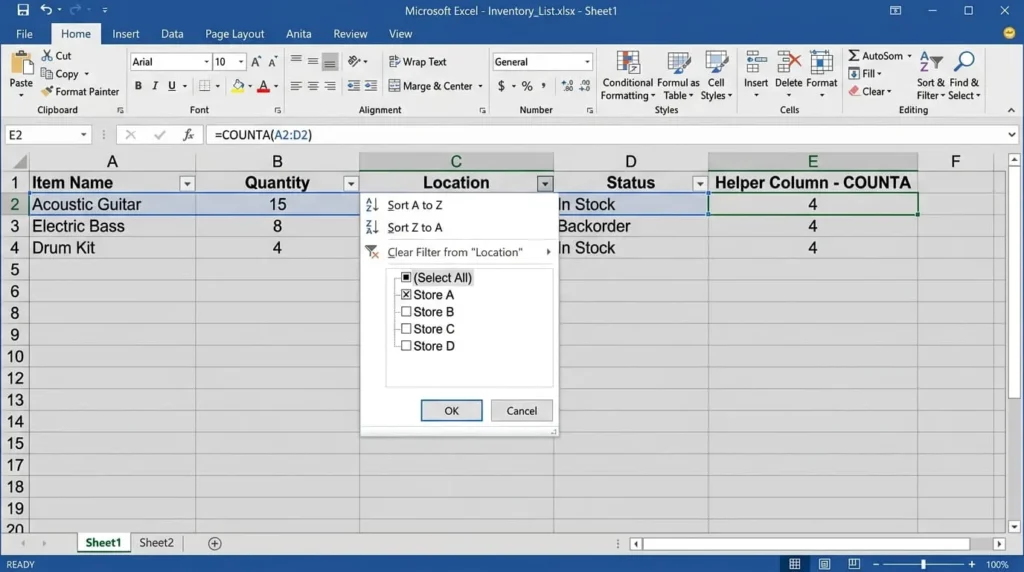
In the first data row of your helper column, type a formula such as =COUNTA(A2:D2), adjusting the range to match the columns in your data. This returns the number of cells in that row that contain something. A result of 0 means the row is completely empty.
Step 3: Fill the formula down
Select the formula cell, then drag the fill handle down through the last row of your data. Every row now has a count next to it.
Step 4: Filter and delete
Select your data range including the helper column, go to the Data tab, and click Filter. Use the dropdown on the helper column to show only rows where the count equals 0. Select those visible rows, right-click, and choose Delete Row. Then remove the filter and delete the helper column.
This approach only removes rows where every single cell is empty, so rows with partial data stay exactly as they are.
Removing Empty Rows Using the Filter Menu Directly
If your rows are either fully populated or fully empty, with no partial gaps, you can skip the helper column. Select your data range, open the Data tab, and click Filter. Open the dropdown on any column, uncheck Select All, and check only Blanks. Excel will show just the empty rows. Select them, right-click on the row numbers, and choose Delete Row.
This is faster than the COUNTA method, but only use it when you are confident there are no rows with partial data mixed in. Recurring cleanup like this often happens right before a trip, which makes it a good moment to also set up an out of office message in Outlook .
Removing Empty Rows by Sorting
Sorting is another option, though it changes the order of your data unless you plan for it. Before sorting, insert a new column and number your rows sequentially from top to bottom. This preserves your original order so you can restore it later.
Next, sort your data by any column that reliably distinguishes blank from non-blank rows, in ascending or descending order. Empty rows will collect at the top or bottom of the range. Select and delete them, then sort again by your index column to return the data to its original sequence. Finally, delete the index column.
This method works well for one-time cleanup jobs but is easy to mess up if you forget to add the index column first, so treat it as a backup rather than your default approach.
Removing Empty Rows in Excel Online
Excel for the web supports the same Filter approach available in the desktop app. Select your range, go to the Data tab, and click Filter. Use the column dropdown to filter for Blanks, select the visible empty rows, right-click, and delete them.
Go To Special is not available in Excel Online, so if you are working entirely in the browser, the COUNTA and Filter methods above are your main options. If you need the older Go To Special workflow, open the file in the desktop app instead.
What if You Are Working With an Excel Table
If your data is formatted as an official Excel Table (created with Insert, then Table, or Ctrl+T), deleting rows works the same way, but you should filter and delete directly within the table’s own filter controls rather than the general Data tab filter. Right-click a selected blank row inside the table and choose Delete, then Table Rows. This keeps the table’s structured references and any formulas tied to the table intact.
When You Should Not Delete Blank Rows
Not every blank row is a mistake. Some spreadsheets use empty rows on purpose, as visual separators between sections of a report, or as spacing above subtotal rows in a financial model. Deleting these can break the layout or, in some models, shift formulas that reference specific row numbers.
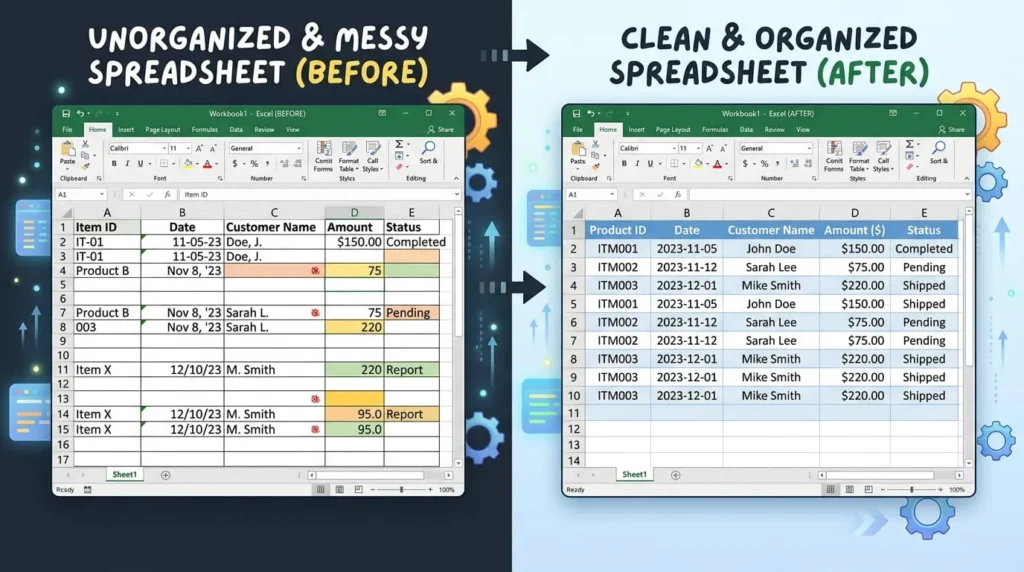
Before deleting anything, scroll through your data and confirm the blank rows are genuinely unintentional. If a blank row is just spacing, consider hiding it or applying a thin border instead of removing it. If you are working in a shared file, check with whoever built it before assuming a blank row is safe to delete.
Removing Empty Rows With Power Query
If you clean the same type of report every week or month, doing this manually gets old fast. Power Query, built into Excel under the Data tab as Get and Transform, can remove blank rows automatically and repeat the process every time you refresh the query.
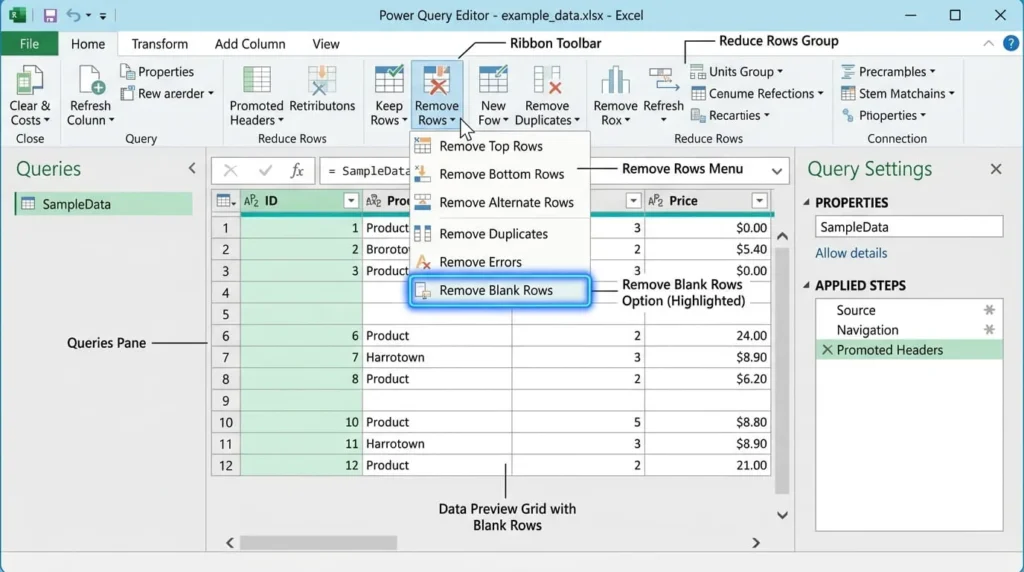
Select your data, go to Data, then From Table or Range, to load it into the Power Query Editor. In the editor, go to the Home tab, click Remove Rows, and choose Remove Blank Rows. Close and load the query back into your workbook. The next time your source data changes, you only need to refresh the query instead of repeating the manual cleanup.
This is the most reliable option for recurring reports, since it removes the risk of accidentally selecting the wrong cells each time.